


Running your boat through the busy summer channels of the St. Lucie River or exploring the beautiful shallow flats around Sewall’s Point requires absolute confidence in your power plant. If you love tracking game fish or cruising out to the local sandbars, you know that keeping your outboard running smoothly is the key to a perfect weekend. Sub-tropical heat and moisture put a continuous strain on marine fuel systems, making regular fuel system maintenance your primary line of defense against unexpected engine surging or lost days on the water.
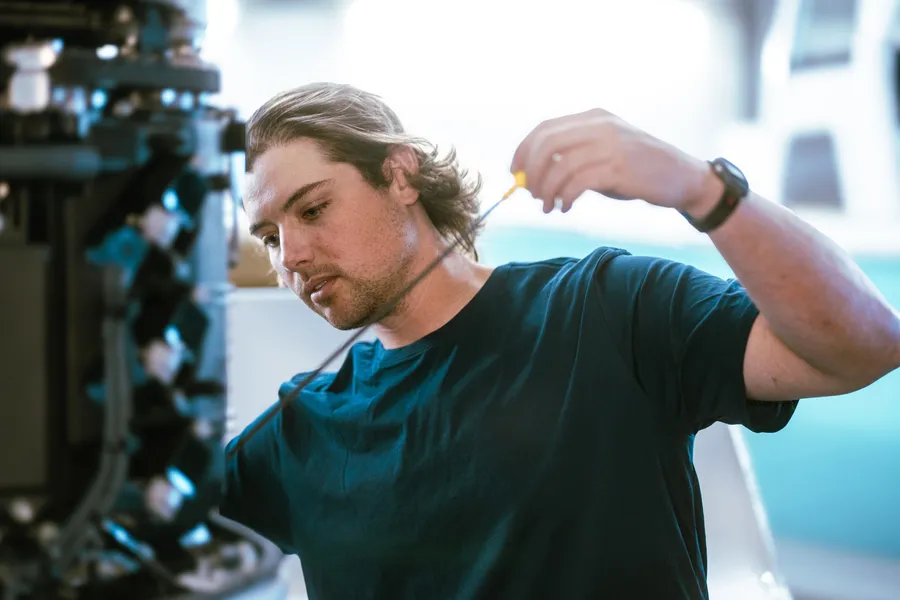
One of the most straightforward ways to safeguard your engine performance is to properly replace your primary on-engine fuel filter element. Following a careful, structured process ensures your fuel delivery remains clean, true, and completely leak-free.
Step 1: Inspect the Fuel Filter Assembly
Before picking up any tools, check the translucent fuel filter cup located on the powerhead. Yamaha designs these assemblies with a loose, bright red indicator ring inside the base. Under normal conditions, this ring sits flat at the absolute bottom of the cup. Because water is heavier than gasoline, any moisture drawn from your fuel tank will settle at the bottom, causing the red ring to float upward. If the ring is floating, it is an immediate warning that you have water contamination in your system.
Step 2: Disconnect the Water Sensor Plug
At the bottom of the filter assembly housing, locate the electrical lead for the water-in-fuel sensor. Gently compress the plastic locking tab and pull to remove the plug from the housing base. Disconnecting this lead prevents you from twisting or straining the delicate electrical wires when you spin the housing cup free.
Step 3: Loosen the Filter Housing Cup
Carefully thread the fuel filter housing cup downward off the fixed top cap assembly. It is highly recommended to loosen the cup by hand or use a specialized plastic filter wrench. Never use heavy metal oil filter pliers or pipe wrenches on the composite plastic top cover or cup, as intense clamping force will easily crack the threads or housing. As the cup unthreads, pay close attention to the large rubber sealing O-ring. Ensure it doesn't stay stuck up inside the hidden upper channel, which could cause it to pinch or misalign during reassembly.
Step 4: Drain and Inspect the Trapped Fuel
Carefully pour the contents of the loose filter housing cup into a clean, clear glass container before extracting the old filter element. Let the drained fuel settle for a few moments to perform a quick visual sweep. Fresh, clean fuel should look uniform and free of floating debris. If you spot distinct clear bubbles or heavy droplets separate at the bottom of the glass, you are looking at accumulated water contamination that needs to be treated before your next long run.
Step 5: Remove the Old Filter Element
Pull the old, disposable primary filter element straight out of the housing cup. Take a quick look at the old element's pleats for trapped sediment, silt, or dark particles that could restrict fuel flow under high-RPM throttle loads. Ensure the small spring or locating pin at the base of the cup remains properly positioned inside the housing block.
Step 6: Install the Fresh Yamaha Filter Element
Slide your fresh, genuine factory replacement filter element directly into the center of the housing cup until it seats fully down against the base structure. Double-check your model specifications or consult a parts specialist to ensure you are utilizing the exact micron rating specified for your horsepower class, protecting your secondary high-pressure pumps and injectors from fine particulate wear.
Step 7: Reattach and Seal the Housing Cup
Lightly lubricate the upper rubber O-ring with a thin film of clean engine oil or premium marine grease to help it seat perfectly without pinching. Thread the filter housing cup back onto the fixed top cap by hand.
A Note on Fuel Variations: If your vessel routinely runs on ethanol-blended fuels, you may notice that the plastic threads on the cup feel tight or resistant during reassembly. Ethanol exposure can cause certain composite plastics to swell slightly over time. Applying a micro-layer of marine grease to the composite threads will ease the tracking logic and allow you to secure a true, tight seal without cross-threading.
Hand-tighten the housing cup firmly until it bottoms out completely against the upper cap assembly. Avoid over-tightening, as crushing the plastic parts can split the housing wall.
Step 8: Reconnect the Water Sensor Module
Snap the electrical water sensor plug back into the base socket until you hear it click securely into place. This automated sensor loop is vital to your engine's protective network; if water levels rise inside the trap during operation, this switch instantly sends a telemetry warning to your dashboard display, letting you address the fuel issue before it causes rough idling or severe cylinder stumbling.
Frequently Asked Questions
What is the legal speed restriction for operating a watercraft after dark in Florida waters? Unlike jurisdictions with blanket numeric nighttime speed caps, Florida maritime law mandates that all vessels maintain a "safe speed" at night based on prevailing visibility, weather, and traffic conditions. However, operators must strictly adhere to localized, posted "Slow Speed, Minimum Wake" restrictions, which legally require the hull to ride fully off plane and completely settled in the water column with a minimal wake profile.
Why is running the engine bilge blower mandatory before launching or starting an inboard vessel? Gasoline fuel vapors are heavier than atmospheric air and naturally accumulate in the lowest quadrants of a sealed engine bay or bilge compartment. Safety regulations dictate that power-operated exhaust blowers must be activated for a minimum of four continuous minutes prior to starting an inboard or sterndrive engine. This process evacuates any trapped combustible vapors, preventing a catastrophic static-spark explosion inside the hull machinery space.
Sourcing Authorized Marine Assets & Technical Upkeep
Safeguarding your vessel through variable seasonal conditions requires outfitting your platform with components and mechanical structures calibrated to exact manufacturer tolerances.
- Thoroughly Inspected Brokerage Inventories: To evaluate rough-water hull geometries, test luxury trim lines, or compare the tracking profiles of elite regional brands, explore our complete regional inventories of premium Used Boats.
- Advanced Transom Repower Operations: If your existing power plant exhibits low-end throttle lag or lacks modern digital networks near the courtesy docks, outfitting your transom through our specialized Repower Yamaha or Repower Mercury hubs installs advanced control systems for absolute handling precision.
- Certified Multi-Point Systems Maintenance: From testing low-voltage battery capacities under load to replacing raw-water pump impellers or diagnosing hydraulic steering binding, trust our factory-trained technicians at the Central Marine Stuart Service Center department for detailed cosmetic detailing and preventative mechanical checks. For do-it-yourself maintenance, our Parts Center supplies factory-direct filters, zinc anodes, and marine accessories.
Fleet Allocation and Financial Coordination
What structural consumer credit frameworks exist for premium vessel procurement? Our internal Financing office constructs customized consumer portfolios, allowing buyers to seamlessly bundle their high-performance hull selection, reliable outboards, technical navigation electronics, and comprehensive Marine Insurance protections into a single structured loan.
Can I leverage my current boat's equity to transition to a modern rough-water platform? Yes. We facilitate transparent, market-accurate asset evaluations to eliminate personal listing delays. To liquidate your old hull and apply its equity directly toward an upgrade, submit your vessel's technical specifications to our Sell / Trade department.
How do I track upcoming dealer events or connect with Central Marine Stuart? To learn about our 39-year legacy serving Treasure Coast mariners since 1987, visit our About Us page. You can monitor our active schedule of safe-boating seminars, captain safety workshops, and regional boat shows on our Events page, track continuous technical maintenance guides on our Blog section, see verified customer feedback on our Reviews directory, or connect directly with our specialized team members via our Staff index. To review extended service coverages, check our Extended Service Contracts checklist, and find current promotions on our Specials page. Experience these performance traits firsthand and evaluate various configurations across real-world water conditions by connecting directly through our main Contact Us portal.